This is the third post in a three part series on using Genesis and Angular. Part 1 can be read here, and Part 2 can be read here.
Routing is part of the magic of web applications, and not something that we really think about when we’re developing WordPress sites since it’s basically taken care of for us in using the nav menu and full on links with page reloading. But this project was all about skipping the page load, and having a view area that will dynamically load posts and pages, an “app-like state” some might say.
Using Genesis and Angular to display posts and pages in an app-like state wasn’t super straightforward. While it opened a few extra cans of worms I wasn’t expecting, adding routing for both posts and pages has proven to be super interesting, and got me digging into WP core as well to find some answers.
Let’s review the goals of this project:
Primary objective: Create a view area that will display all the contents of posts and pages without a page reload using Genesis and Angular.
Do this by:
- Adding markup to my Genesis child theme
- Fetching data with the WP REST API and Angular
- Routing the data Angular on posts and pages
Ok, this is going to be a bit of a beast, so let’s get truckin’…
Move Files to Assets Folder
The first thing we’re going to do is rearrange our file structure a bit, so we don’t have random Angular app code and template files all over our Genesis child theme. So, I’ve created an assets folder in the child theme directory, and moved the template files and also the Angular app JavaScript files out of this. If you want to look ahead, here’s the repo on GitHub.
If you want to follow along, the file structure (not including other Genesis files from the sample theme) is:
All the PHP below is still going into the functions.php file for now, but this could be moved to the assets directory as well, to a load-app.php file, which can be loaded from the child theme’s functions.php file. Totally up to you.
Now that we’ve got the file structure in place, let’s get routing!
Basics of Routing
Routing isn’t hard to understand, it’s just hard to implement (well, not if you’re using Angular and the UI Router!). In the first part of this series, we set out our ng-view with Genesis markup. The idea is that we want to have the view in the area where we would normally view post or page (or any!) content. However, to get all of this updating dynamically, we’ve got to set up our controllers and routes so that if someone goes to the slug my-latest-post, the post titled “My Latest Post” shows up.
Simple, right? Good. This allows us to manage “state”, and we’re going to use the UI Router from Angular UI to take care of this.
First, we’ll need to include it as a dependency in our Angular app. So, we need to enqueue the scripts (I’ve got them installed via Bower, but you can install them via zip file or CDN). You can enqueue them with the standard wp_enqueue_script() function. Then, we want to include it as a dependency in our app in our app.js file:
Good, now, let the fun begin. We are going to manage the routes with a config() function, which will chain to our angular app module (make sure you see the end results below and in the GitHub repo for clarification, I’m just talking through this now). This is what we want:
Ok, what did we do here? First, we’re injecting $stateProvider, $urlRouterProvider, and $locationProvider into our config() function. This allows us to use the methods and properties associated with these services in Angular and Angular UI to direct our routing. See the links below for more info.
Then, we’re using the $state provider to declare where we want our app to look when someone is at a particular URL. First, we set up the otherwise() function, which just means that if there’s no route match, just return to this. We’ve set the otherwise default to /, which is our homepage.
From there, we assign state we want to the url, a controller to handle our model and a template to handle our view. For the first state, we’re basically saying “We’re in a posts state when the url is at the base of the application / , and when that’s the case, we want to use the Posts controller to handle our model data and the app-index.html template to handle our view.
We’ve already looked at that mostly in the last part of this series, but that gives us our basic homepage listing of posts:
Set Up Routing for Posts
Routing for posts and routing for pages is going to be very similar. Basically, whenever someone navigates to the-target-post slug after home url slug, we want the router to notice that this is a post, and that it should use the singleView controller and single.html template file. No problem.
However, we need to do a bit of forward thinking. We’re use to having WordPress take care of the routing for us on our pages and posts, but since we’re using Genesis and Angular now, we’ve got to think about how to differentiate the request calls to the WP REST API. The easiest way to do this is to prefix the slug with posts or pages so that the router knows which controller and template to use, and that’s just what you see in the above code snippet with state routes: .state('single', { url: '/posts/:slug/', ...
This means that, since the router is looking at the url to figure out where to send us, we can now direct it to the proper controller and view. Routes are similar to if or switch statements; “if the slug is prefixed with posts, then use the singleView controller…” etc.
To get our single view showing up then, we need to make sure we’re doing three things:
- Linking to the posts properly from our home page
- Creating the view properly for our single posts page
- Giving the controller the right data to work with so we can get back a JSON object with our single post view.
First, we need to make sure we’re linking properly from our app-index.html view on our home page. To do this, we just need to make sure the h2 titles and Read More anchor links are populated with the right href. To do this, our title with look something like this: href="/posts/{{post.slug}}/">{{post.title.rendered}} and our Read More link will look something like this: href="/posts/{{post.slug}}/">Read more...
Here’s the final app-index.html view:
That will link us correctly to any post that is fetched from the WP REST API to the single view.
Second, we need to create a single.html view for the router and controller to use. We can actually reuse a lot from our app-index.html view, with some slight modifications. You can feel free to add or subtract to this template:
As you can see, we’re using the singleView controller in this template, so Angular knows that it should reference that controller when working with that view.
Third, we need to set up our singleView controller to handle our model logic. We’re basically using the same controller from Posts, but making a different API call based on the posts/ slug. If you look on the router, you’ll see the url property has a value of 'posts/:slug/'. This means that the slug is a variable, and can be read using the $stateParams and $stateProvider services. You see that in the controller when we specify that we want the $stateParams.slug property value in the singleView controller.
You’ll also notice that in that we are making a call to the WP REST API using a filter with the name of the slug. The request is going to the posts endpoint and returning all posts with a slug value that matches the one being linked to from our homepage.
Like a Highlander, there should only be one slug (JSON post object) returned.
Phew, that’s a lot, but fear not! We’re basically doing the same thing with Pages, only with a slight twist…
Set Up Routing for Pages
The idea for routing pages is basically the same:
- Linking to the page properly from our home page or nav menu
- Creating the view properly for our pages
- Giving the controller the right data to work with so we can get back a JSON object with our page view.
Now, we can see that we already have a problem linking to pages since we’re currently not controlling the output for our menus, and we’re probably not including pages in our posts that we can link to. Remember: we’re using a prefixed slug to navigate to posts and pages. That means that we need to modify the links in the nav menu to bend them to our will.
How do we do that?
After a little research and digging around in WP core, I found a filter we can use to change the links in the menu. By default, WordPress will return all menu items as full links, for example : https://example.com/about-page. However, we want to remove the base url, and add pages to the front, so the link on the nav menu will be simply /pages/about-page/.
Here’s the filter I used to change the nav menu link items:
Pretty cool right? So, we’ve got our linking done, and now, steps two and three are easy and basically the same as before.
Create the page view:
Create the controller:
Excellent, all the pieces are in play, we’ve just got to talk about one more bit.
To Hash or Not to Hash
By default, Angular will “hash” your urls, meaning that it will prefix everything with a #. This was the first step in using browser history and linking in web apps a few years ago. Actually, you can still see this in your Gmail if you’re using the web app, you can navigate to your Inbox, Starred, etc. and you’ll see #inbox, #starred, etc. in the url.
I don’t really like these, so I’ve added the $locationProvider.html5Mode(true); in the router above to turn off the hashing.
If you do that, you also need to a the to your file. Since we’re using Genesis and Angular together, I’ve hooked that into the wp_head:
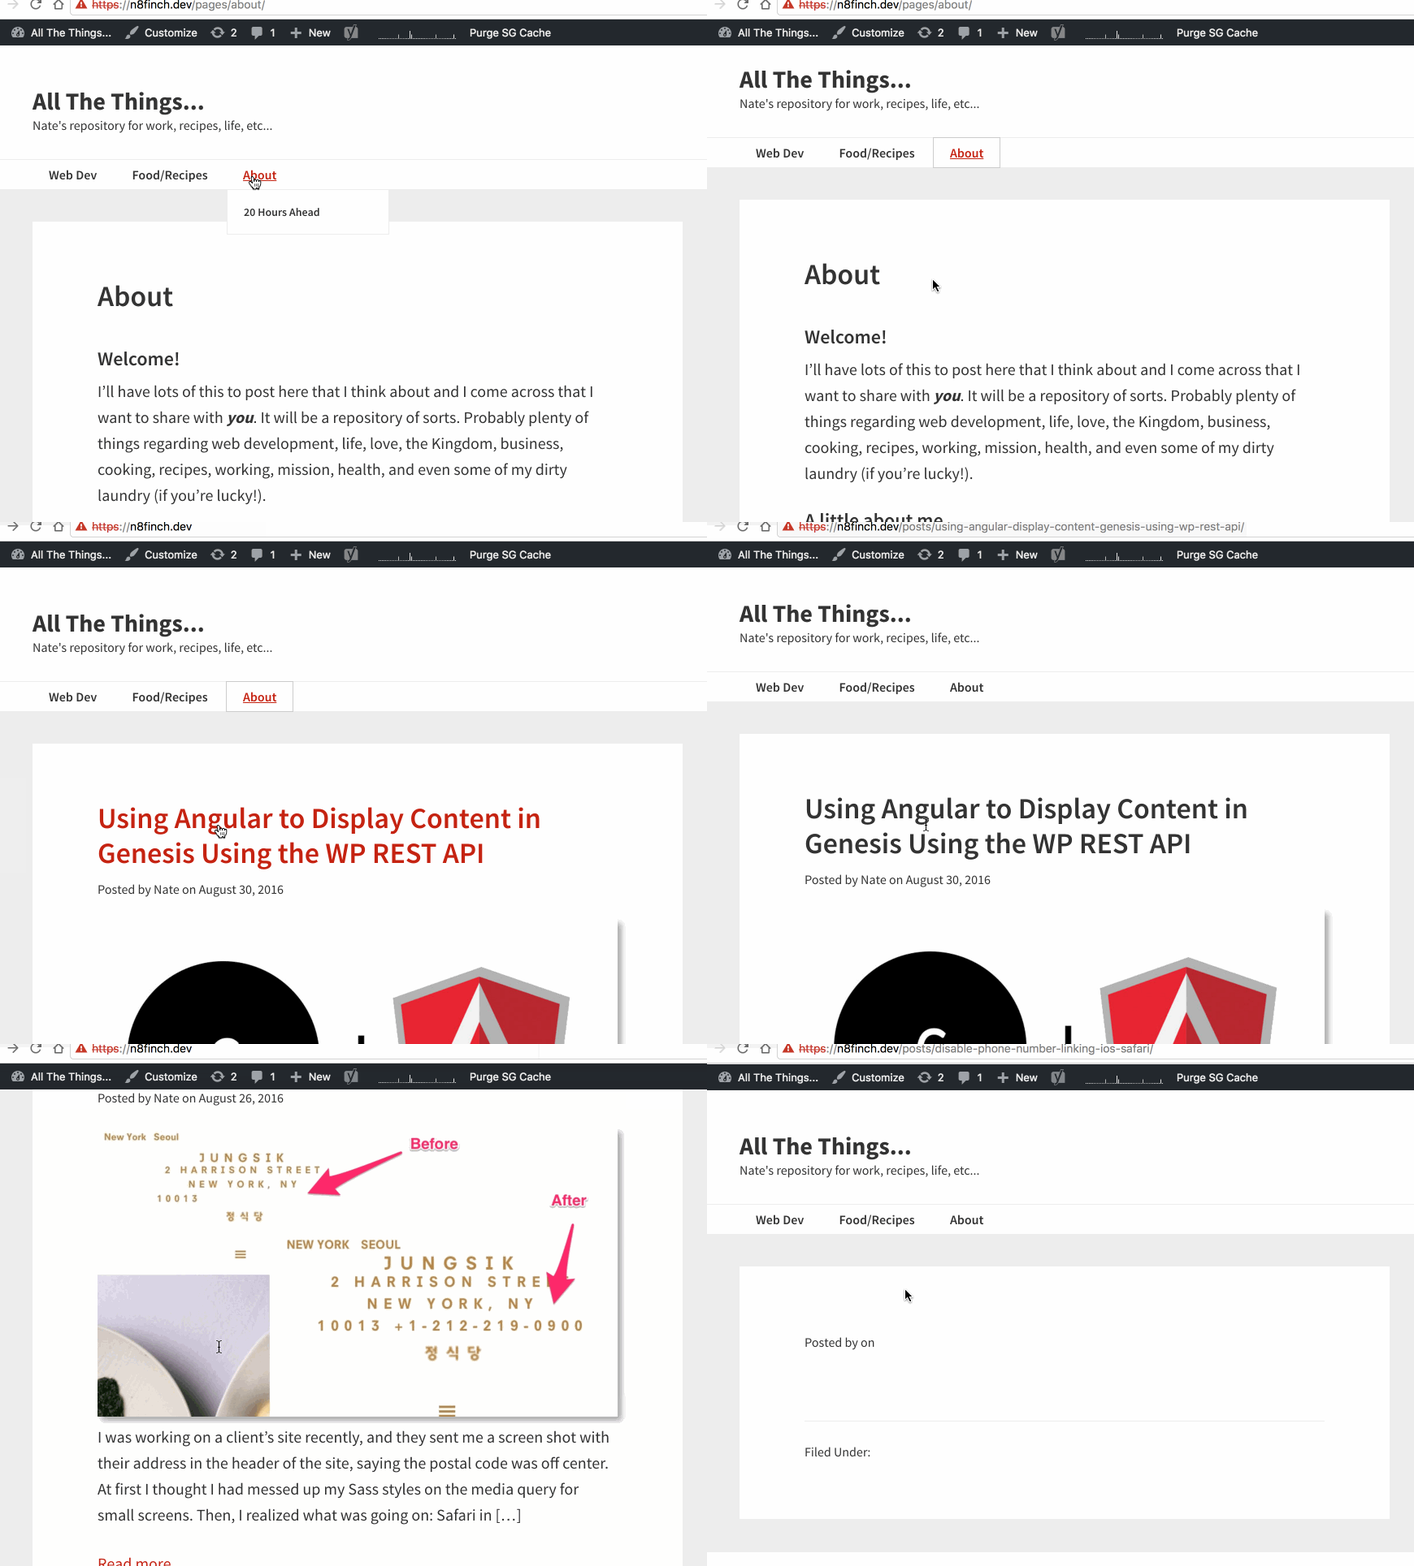
And now, everything should be working. You should be able to display all the contents of posts and pages without a page reload using Genesis and Angular:
As you can see in the gif, there’s no page reload, and we can navigate with posts on the main page and page links in the menu. You can see the final code here on GitHub.
Mission accomplished.
Why I’m Stopping Here
There is still plenty to work to do here, but the primary objective of creating a view for posts and pages with no reload is complete. Angular is a massive framework, and it’s going to take a while to explore. Also, there are a few other reasons for stopping here…
Leaving Angular 1 for Angular 2: Since I began my dive into Angular, Angular 2 has been released, and there won’t be any more development on Angular 1. This example has been using Angular 1. Angular 2 is sufficiently different that I’ll need to go ahead and start re-learning a lot of what I’ve already done. It is also where all the new development will be happening. So, I’m going to set Angular 1 aside. I might rebuild this in the future with Angular 2, but I also might use something a little lighter like Vue.js
Exploring the WP REST API further: There’s a ton that the WP REST API can do, and this is all scratching the surface. I’ve learned how to create my own endpoints, fetch general and specific data, and a whole bunch of other stuff not included in this series of posts. I’ll be working on a couple plugins that use the WP REST API to CRUD data as well. More on that later.
All the little quirks that com along with an app-like state: There are several issues with running an app on top of WordPress, not least of which is re-organizing or re-wiring plugins and core functionality to suit the needs of the app. We saw that with filtering the page links in the nav menu to properly route to our templates and controllers. Currently, that’s beyond the scope of this project. I also don’t have a specific use case for it yet. So, changing this around will need to wait.
Basically, while this is a great starting point for an Angular 1.x and Genesis theme, I’m not going to be implementing it anytime soon in production, and that’s ok.
This has been fun, though! I learned a lot, I feel like I’ve made progress as a front-end developer, and I can feel good about moving on to working with Angular 2 and custom WordPress plugins.
Cheers!
Helpful Links
developer.wordpress.org/reference/hooks/wp_setup_nav_menu_item
angular-ui.github.io/ui-router/site/#/api/ui.router
docs.angularjs.org/api/ng/provider/$locationProvider
knowthecode.io/docx/wordpress/apply_filters
knowthecode.io/docx/wordpress/add_filter
deliciousbrains.com/creating-a-wordpress-theme-using-the-rest-api-and-vue-js


